Menu

Lying DNS

As I was looking at alternative web browsers, with privacy in mind, I ended up installing Iridium (in two words: Chrome fork), tempted to try it out. I first went to Youtube, and after my first video, was being subjected to one of these advertisement sneaking in between videos, that horrible “skip add” button after a few seconds, … I was shocked enough, to open Chromium back.

This is a perfect occasion to discuss about lying DNS servers, and how having your own cache can help you clean up your web browsing experience from at least part of these unsolicited intrusions.

We would mainly talk about a lying DNS server (or cache, actually) alongside Internet censorship, whenever an operator either refuses to serve DNS records or diverts them somewhere else.
Yet some of the networks I manage may relay on DNS resolvers that would purposefully prevent some records from being resolved.

You may query google for lists of domain names likely to host irrelevant contents. These are traditionally formatted as an hosts file, and may be used as is on your computer, assuming you won’t need serving these records to other stations in your LAN.

Otherwise, servers such as Dnsmasq, Unbound or even Bind (using RPZ, although I would recommend sticking to Unbound) may be configured overwriting records for a given list of domains.
Currently, I trust a couple sites to provide me with a relatively exhaustive list of unwanted domain names, using a script to periodically re-download these, while merging them with my own blacklist (see my puppet modules set for further details on how I configure Unbound). I wouldn’t recommend this to anyone: using dynamic lists is risky to begin with … Then again, I wouldn’t recommend a beginner to setup his own DNS server: editing your own hosts file could be a start, though.

Instead of yet another conf dump, I’ld rather point to a couple posts I used when setting it up: the first one from Calomel (awesome source of sample configurations running on BSD, check it out, warmest recommendations …) and an other one from a blog I didn’t remember about – although I’ve probably found it at some point in the past, considering we pull domain names from the same sources…

Wazuh

As a follow-up to our previous OSSEC post, and to complete the one on Fail2ban & ELK, we’ll review today Wazuh.

netstat alerts

netstat alerts

As their documentation states it, “Wazuh is a security detection, visibility, and compliance open source project. It was born as a fork of OSSEC HIDS, later was integrated with Elastic Stack and OpenSCAP evolving into a more comprehensive solution“. We could remark that OSSEC packages used to be distributed on some Wazuh repository, while Wazuh is still listed as OSSEC official training, deployment and assistance services provider. You might still want to clean up some defaults, as you would soon end up receiving notifications for any connection being established or closed …

OSSEC is still maintained, last commit to their GitHub project was a couple days ago as of writing this post, while other commits are being pushed to Wazuh repository. If both products are still active, my last attempts configuring Kibana integration with OSSEC was a failure, due to Kibana5 not being supported. Considering Wazuh offers enterprise support, we could assume their sample configuration & ruleset are at least as relevant as those you’ld find with OSSEC.

wazuh manager status

wazuh manager status

Wazuh documentation is pretty straight-forward, a new service wazuh-api (NodeJS) would be required on your managers, which would then be used by Kibana querying Wazuh status. Debian packages were renamed from ossec-hids & ossec-hids-agent to wazuh-manager & wazuh-agent respectively. Configuration is somewhat similar, although you won’t be able to re-use those you could have installed alongside OSSEC. Note the wazuh-agent package would install an empty key file: you would need to drop it, prior to registering against your manager.


wazuh-agents

wazuh agents

Configuring Kibana integration, note Wazuh documentation misses some important detail, as reported on GitHub. That’s the single surprise I had reading through their documentation, the rest of their instructions work as expected: having installed and started wazuh-api service on your manager, then installed Kibana wazuh plugin on your all your Kibana instances, you would find some Wazuh menu showing on the left. Make sure your wazuh-alerts index is registered in the Management section, then go to Wazuh.

If uninitialized, you would be offered to enter your Wazuh backend URL, a port, a username and corresponding password, connecting to wazuh-api. Note that configuration would be saved into some new .wazuh index. Once configured, you would have some live view of your setup, which agents are connected, what alerts you’re receiving, … eventually, set up new dashboards.

Comparing this to OSSEC PHP web interface, marked as deprecated since years, … Wazuh takes the lead!

CIS compliance

CIS compliance

OSSEC alerts

OSSEC alerts

Wazuh Overview

Wazuh Overview

PCI Compliance

PCI Compliance

HighWayToHell

Quick post promoting HighWayToHell, a project I posted to GitHub recently, aiming to provide with a self-hosted Route53 alternative, that would include DNSSEC support.

Assuming you may not be familiar with Route53, the main idea is to generate DNS zones configuration based on conditionals.

edit health check

edit health check

We would then try to provide with a lightweight web service to manage DNS zones, their records, health checks and notifications. Contrarily to Route53: we would implement DNSSEC support.

HighWayToHell distribution

HighWayToHell distribution

HighWayToHell works with a Cassandra cluster storing persistent records, and at least one Redis server (pubsub, job queues, ephemeral tokens). Operations are split in four workers: one in charge of running health checks, an other one of sending notifications based on health checks last returned values and user-defined thresholds, a third one is in charge of generating DNS (bind or NSD) zone include files and zones configurations, the last worker implements an API gateway providing with a lightweight web app.

Theoretically, it could all run on one server, although hosting a DNS setup, you’ll definitely want to involve at least a pair of name servers, and probably want to use separate instances running your web frontend, or dealing with health checks.

list records

list records

Having created your first account, registered your first domain, you would be able to define your first health checks and DNS records.

add record

update record

You may grant third-party users with a specific roles accessing resources from your domains. You may enable 2FA on your accounts using apps such as Authy. You may create and manage tokens – to be used alongside our curl-based shell client, …

delegate management

delegate management

This is a couple weeks old project I didn’t have much time to work on, yet it should be exhaustive and reliable enough to fulfill my original expectations. Eventually, I’ll probably add an API-less management CLI: there still is at least one step, starting your database, that still requires inserting records manually, …

Curious to know more? See our QuickStart docs!

Any remark, bug-report or PR most welcome. Especially CSS contributions – as this is one of the rare topic I can’t bear having to deal with.

Ceph Luminous – 12

In the last few days, Ceph published Luminous 12.1.1 packages to their repositories, release candidate of their future LTS. Having had bad experiences with their previous RC, I gave it a fresh look, dropping ceph-deploy and writing my own Ansible roles instead.

typo listing RGW process

Small typo displaying Ceph Health, if you can notice it

Noticeable changes since Luminous include CephFS being -allegedly- stable. I didn’t test it myself yet, although I’ve been hearing about that feature being unstable since my first days testing Ceph, years ago.

RadosGateway multisite sync status

RadosGateway multisite sync status

Another considerable change that showed up and is now considered stable, is a replacement implementation of Ceph FileStore (relying on ext4, xfs or btrfs partitions), called BlueStore. The main change being that Ceph Object Storage processes would no longer mount a large filesystem storing their data. Beware that recovery scripts reconstructing block devices scanning for PG content in OSD filesystems would no longer work – it is yet unclear how a disaster recovery would work, recovering data from an offline cluster. No surprises otherwise, so far so good.

Also advertised: the RBD-mirror daemon (introduced lately) is now considered stable running in HA. From what I’ve seen, it is yet unclear how to configure HA starting several mirrors in a single cluster – I very much doubt this would work out of the box. We’ll probably have to wait a little longer, for Ceph documentation to reflect the last changes introduced on that matter.

As I had 2 Ceph clusters, I could confirm RadosGW Multisite configuration works perfectly. Now that’s not a new feature, still it’s the first time I actually set this up. Buckets are eventually replicated to remote cluster. Documentation is way more exhaustive, works as advertised: I’ll stick to this, until we learn more about RBD mirroring.

Querying for the MON commands

Ceph RestAPI Gateway

Freshly introduced: the Ceph RestAPI Gateway. Again, we’re missing some docs yet. On paper, this service should allow you to query your cluster as you would have with Ceph CLI tools, via a Restful API. Having set one up, it isn’t much complicated – I would recommend not to use their built-in webserver, and instead use nginx and uwsgi. The basics on that matter could be found on GitHub.

Ceph health turns to warning, watch for un-scrubbed PGs

Ceph health turns to warning, watch for un-scrubbed PGs

Even though Ceph Luminous shouldn’t reach LTS before their 12.2.0 release, as of today, I can confirm Debian Stretch packages are working relatively well on a 3-MON 3-MGR 3-OSD 2-RGW with some haproxy balancer setup, serving with s3-like buckets. Although note there is some weirdness regarding PG scrubbing, you may need to add a cron job … And if you consider running Ceph on commodity hardware, consider that their last releases may be broken.

ceph dashboard

Ceph Dashboard

edit: LTS released as of late August: SSE4.2 support still mandatory deploying your Luminous cluster, although a fix recently reached their master branch, ….

As of late September, Ceph 12.2.1 release can actually be installed on older, commodity hardware.
Meanwhile, a few screenshots of Ceph Dashboard were posted to ceph website, advertising on that new feature.

KeenGreeper

Short post today, introducing KeenGreeper, a project I freshly released to GitHub, aiming to replace Greenkeeper 2.

For those of you that may not be familiar with Greenkeeper, they provide with a public service that integrates with GitHub, detects your NodeJS projects dependencies and issues a pull request whenever one of these may be updated. In the last couple weeks, they started advertising about their original service being scheduled for shutdown, while Greenkeeper 2 was supposed to replace it. Until last week, I’ve only been using Greenkeeper free plan, allowing me to process a single private repository. Migrating to GreenKeeper 2, I started registering all my NodeJS repositories and only found out 48h later that it would cost me 15$/month, once they would have definitely closed the former service.

Considering that they advertise on their website the new version offers some shrinkwrap support, while in practice outdated wrapped libraries are just left to rot, … I figured writing my own scripts collection would definitely be easier.

keengreeper lists repositories, ignored packages, cached versions

keengreeper lists repositories, ignored packages, cached versions

That first release addresses the first basics, adding or removing repositories to some track list, adding or removing modules to some ignore list, preventing their being upgraded. Resolving the last version for a package from NPMJS repositories, and keeping these in a local cache. Works with GitHub as well as any ssh-capable git endpoint. Shrinkwrap libraries are actually refreshed, if such are present. Whenever an update is available, a new branch is pushed to your repository, named after the dependency and corresponding version.

refresh logs

refresh logs

Having registered your first repositories, you may run the update job manually and confirm everything works. Eventually, setup a cron task executing our job script.

Note that right now, it is assumed the user running these scripts has access to a SSH key granting it with write privileges to our repositories, pushing new branches. Now ideally, either you run this from your laptop and can assume using your own private key is no big deal, or I would recommend creating a third-party GitHub user, with its own SSH key pair, and grant it read & write access to the repositories you intend to have it work with.

repositories listing

repositories listing

Being a 1 day DYI project, every feedback is welcome, GitHub is good place to start, …

PM2

systemctl integration

systemctl integration

PM2 is a NodeJS processes manager. Started on 2013 on GitHub, PM2 is currently the 82nd most popular JavaScript project on GitHub.


PM2 is portable, and would work on Mac or Windows, as well as Unices. Integrated with Systemd, UpStart, Supervisord, … Once installed, PM2 would work as any other service.


The first advantage of introducing PM2, whenever dealing with NodeJS services, is that you would register your code as a child service of your main PM2 process. Eventually, you would be able to reboot your system, and recover your NodeJS services without adding any scripts of your own.

pm2 processes list

pm2 processes list

Another considerable advantage of PM2 is that it introduces clustering capabilities, most likely without requiring any change to your code. Depending on how your application is build, you would probably want to have at least a couple processes for each service that serves users requests, while you could see I’m only running one copy of my background or schedule processes:


nodejs sockets all belong to a single process

nodejs sockets all belong to a single process

Having enabled clustering while starting my foreground, inferno or filemgr processes, PM2 would start two instances of my code. Now one could suspect that, when configuring express to listen on a static port, starting two processes of that code would fail with some EADDRINUSE code. And that’s most likely what would happen, when instantiating your code twice. Yet when starting such process with PM2, the latter would take over socket operations:

And since PM2 is processing network requests, during runtime: it is able to balance traffic to your workers. While when deploying new revisions of your code, you may gracefully reload your processes, one by one, without disrupting service at any point.

pm2 process description

pm2 process description

PM2 also allows to track per-process resources usage:

Last but not least, PM2 provides with a centralized dashboard. Full disclosure: I only enabled this feature on one worker, once. And wasn’t much convinced, as I’m running my own supervision services, … Then again, you could be interested, if running a small fleet, or if ready to invest on Keymetrics premium features. Then again, it’s worth mentioning that your PM2 processes may be configured forwarding metrics to Keymetrics services, so you may keep an eye on memory or CPU usages, application versions, or even configure reporting, notifications, … In all fairness, I remember their dashboard looked pretty nice.

pm2 keymetrics dashboard, as advertised on their site

pm2 keymetrics dashboard, as advertised on their site

Devuan

devuan-logo

devuan-logo

In many ways, Devuan is very similar to the OS it was forked from: Debian. Most of its packages come directly from Debian repositories, only a few (381 as of today) were re-build for Devuan, wiping systemd from their dependencies.

The project started back in late 2014, while systemd screw its way into Debian – and most of common Linux distros. Systemd is accused to be more than a replacement to init, as it takes on parts of the boot process and runtime operations. Contradicting UNIX philosophy. Aggressively integrated itself into Linux core components. Systemd implies more reboot, targets desktop users, left of non-Linux kernel users (Debian had to drop their kfreebsd architecture), … is known to be buggy, when not described as broken by design, or identified as a trojan.

On the other hand, Poettering is backed by its employer, Red-Hat. Systemd is not the first pike of crap we can usually find in all package managers, such as PulseAudio or Avahi (the ones you should usually blacklist). No surprises, after these, Poettering is immune to criticisms, and can pretty much follow his ideas ignoring complaints from the community he’s dismantling.

In this context, a group of Debian users and contributors, identifying themselves as “Veteran Unix Admins”, organized and eventually came up with Devuan. So far, their objective is to drop systemd dependencies from Debian Jessie. Re-build a community around what made Debian strengths, while abiding to the UNIX philosophy.

The first time I read about Devuan, their web page was pretty ugly and minimalist. Last week-end, I checked it back and noticed they released their second Beta: time for giving it a look.

PXE install works exactly as we’ve been used to with Debian. So far, I’ve been setting up a KVM server, an OpenLDAP, an apache-based reverse proxy, a DHCP, a Squid proxy, a TFTP server, … there’s virtually no difference with Debian. The few things I could note being the devuan-baseconf and devuan-keyring packages or the /etc/devuan_release file.

My only complaint so far, is that some packages still ship with systemd services configuration (acpid, apache2, apt-cacher-ng, cron, munin-node, nginx, rsync, rsyslog, ssh, udev or unattended-upgrades files in /lib/systemd/system). Being a Beta release, I’m satisfied enough confirming that all these process work perfectly using scripts from /etc/init.d or /usr/sbin/service. Although for a first “stable” release, I would very much like to see a “clean” copy of Debian.

Fail2ban & ELK

Following up on a previous post regarding Kibana and ELK5 recent release, today we’ll follow up configuring some map visualizing hosts as Fail2ban blocks them.

Having installed Fail2ban and configured the few jails that are relevant for your system, look for Fail2ban log file path (variable logtarget, defined in /etc/fail2ban/fail2ban.conf, defaults to /var/log/fail2ban.log on debian).

The first thing we need is to have our Rsyslog processing Fail2ban logs. Here, we would use Rsyslog file input module (imfile), and force using FQDN instead of hostnames.

$PreserveFQDN on
module(load=”imfile” mode=”polling” PollingInterval=”10″)
input(type=”imfile”
  File=”/var/log/fail2ban.log”
  statefile=”/var/log/.fail2ban.log”
  Tag=”fail2ban: ”
  Severity=”info”
  Facility=”local5″)

Next, we’ll configure Rsyslog forwarding messages to some remote syslog proxy (which will, in turn, forward its messages to Logstash). Here, I usually rely on rsyslog RELP protocol (may require installing rsyslog-relp package), as it addresses some UDP flaws, without shipping with traditional TCP syslog limitations.

Relaying syslog messages to our syslog proxy: load in RELP output module, then make sure your Fail2ban logs would be relayed.

$ModLoad omrelp
local5.* :omrelp:rsyslog.example.com:6969

Before restarting Rsyslog, if it’s not already the case, make sure the remote system would accept your logs. You would need to load Rsyslog RELP input module. Make sure rsyslog-relp is installed, then add to your rsyslog configuration

$ModLoad imrelp
$InputRELPServerRun 6969

You should be able to restart Rsyslog on both your Fail2ban instance and syslog proxy.

Relaying messages to Logstash, we would be using JSON messages instead of traditional syslog formatting. To configure Rsyslog forwarding JSON messages to Logstash, we would use the following

template(name=”jsonfmt” type=”list” option.json=”on”) {
    constant(value=”{“)
    constant(value=”\”@timestamp\”:\””) property(name=”timereported” dateFormat=”rfc3339″)
    constant(value=”\”,\”@version\”:\”1″)
    constant(value=”\”,\”message\”:\””) property(name=”msg”)
    constant(value=”\”,\”@fields.host\”:\””) property(name=”hostname”)
    constant(value=”\”,\”@fields.severity\”:\””) property(name=”syslogseverity-text”)
    constant(value=”\”,\”@fields.facility\”:\””) property(name=”syslogfacility-text”)
    constant(value=”\”,\”@fields.programname\”:\””) property(name=”programname”)
    constant(value=”\”,\”@fields.procid\”:\””) property(name=”procid”)
    constant(value=”\”}\n”)
  }
local5.* @logstash.example.com:6968;jsonfmt

Configuring Logstash processing Fail2ban logs, we would first need to define a few patterns. Create some /etc/logstash/patterns directory. In there, create a file fail2ban.conf, with the following content:

F2B_DATE %{YEAR}-%{MONTHNUM}-%{MONTHDAY}[ ]%{HOUR}:%{MINUTE}:%{SECOND}
F2B_ACTION (\w+)\.(\w+)\[%{POSINT:pid}\]:
F2B_JAIL \[(?\w+\-?\w+?)\]
F2B_LEVEL (?\w+)\s+

Then, configuring Logstash processing these messages, we would define an input dedicated to Fail2ban. Having tagged Fail2ban events, we will apply a Grok filter identifying blocked IPs and adding geo-location data. We’ll also include a sample output configuration, writing to ElasticSearch.

input {
  udp {
    codec => json
    port => 6968
    tags => [ “firewall” ]
  }
}

filter {
  if “firewall” in [tags] {
    grok {
      patterns_dir => “/etc/logstash/patterns”
      match => {
        “message” => [
          “%{F2B_DATE:date} %{F2B_ACTION} %{F2B_LEVEL:level} %{F2B_JAIL:jail} %{WORD:action} %{IP:ip} %{GREEDYDATA:msg}?”,
          “%{F2B_DATE:date} %{F2B_ACTION} %{WORD:level} %{F2B_JAIL:jail} %{WORD:action} %{IP:ip}”
        ]
      }
    }
    geoip {
      source => “ip”
      target => “geoip”
      database => “/etc/logstash/GeoLite2-City.mmdb”
      add_field => [ “[geoip][coordinates]”, “%{[geoip][longitude]}” ]
      add_field => [ “[geoip][coordinates]”, “%{[geoip][latitude]}” ]
    }
    mutate {
      convert => [ “[geoip][coordinates]”, “float” ]
    }
  }
}

output {
  if “_check_logstash” not in [tags] and “_grokparsefailure” not in [tags] {
    elasticsearch {
      hosts => [ “elasticsearch1.example.com”, “elasticsearch2.example.com”, “elasticsearch3.example.com” ]
      index => “rsyslog-%{+YYYY.MM.dd}”
    }
  }
  if “_grokparsefailure” in [tags] {
    file { path => “/var/log/logstash/failed-%{+YYYY-MM-dd}.log” }
  }
}

Note that if I would have recommended using RELP inputs last year, running Logstash 2.3: as of Logstash 5 this plugin is no longer available. Hence I would recommend setting up some Rsyslog proxy on your Logstash instance, in charge of relaying RELP messages as UDP ones to Logstash, through your loopback.

Moreover: assuming you would need to forward messages over a public or un-trusted network, then using Rsyslog RELP modules could be used with Stunnel encapsulation. Whereas running Debian, RELP output with TLS certificates does not seem to work as of today.

That being said, before restarting Logstash, if you didn’t already, make sure to define a template setting geoip type to geo_point (otherwise shows as string and won’t be usable defining maps). Create some index.json file with the following:

{
  “mappings”: {
    “_default_”: {
      “_all”: { “enabled”: true, “norms”: { “enabled”: false } },
      “dynamic_templates”: [
        { “template1”: { “mapping”: { “doc_values”: true, “ignore_above”: 1024, “index”: “not_analyzed”, “type”: “{dynamic_type}” }, “match”: “*” } }
      ],
      “properties”: {
        “@timestamp”: { “type”: “date” },
        “message”: { “type”: “string”, “index”: “analyzed” },
        “offset”: { “type”: “long”, “doc_values”: “true” },
        “geoip”: { “type” : “object”, “dynamic”: true, “properties” : { “location” : { “type” : “geo_point” } } }
      }
    }
  },
  “settings”: { “index.refresh_interval”: “5s” },
  “template”: “rsyslog-*”
}

kibana search

kibana search

Post your template to ElasticSearch

root@logstash# curl -XPUT http://elasticsearch.example.com:9200/_template/rsyslog?pretty -d@index.json

You may now restart Logstash. Check logs for potential errors, …

kibana map

kibana map

Now to configure Kibana: start by searching for Fail2ban logs. Save your search, so it can be re-used later on.

Then, in the Visualize panel, create a new Tile Map visualization, pick the search query you just saved. You’re being asked to select bucket type: click on Geo Coordinates. Insert a Label, click the Play icon to refresh the sample map on your right. Save your Visualization once you’re satisfied: these may be re-used defining Dashboards.

BlueMind Best Practices

Following up on a previous post introducing BlueMind, today we’ll focus on good practices (OpenDKIM, SPF, DMARC, ADSP, Spamassassin, firewalling) setting up their last available release (3.5.2) – and mail servers in general – while migrating my former setup (3.14).

A first requirement to ease up creating mailboxes, and manipulating passwords during the migration process, would be for your user accounts and mailing lists to be imported from some LDAP backend.
Assuming you do have a LDAP server, then you will need to create some service account in there, so BlueMind can bind. That account should have read access to your userPassword, pwdAccountLockedTime, entryUUID, entryDN, createTimestamp, modifyTimestamp and shadowLastChange attributes (assuming these do exist on your schema).
If you also want to configure distribution lists from LDAP groups, then you may want to load the dyngroup schema.

Another key to migrating your mail server would be to duplicate messages from one backend to another. Granted that your mailboxes already exist on both side, that some IMAP service is running on both sides, and that you can temporarily force your users password: then a tool you should consider is ImapSync. ImapSync can run for days, duplicate billions of mails, in thousands of folders, … Its simplicity is its strength.
Ideally, we would setup our new mail server without moving our MXs yet. The first ImapSync run could take days to complete. From there, next runs would only duplicate new messages and should go way faster: you may consider re-routing new messages to your new servers, continuing to run ImapSync until your former server stops receiving messages.

To give you an idea, my current setup involves less than 20 users, a little under 1.500.000 messages in about 400 folders, using around 30G of disk space. The initial ImapSync job ran for about 48 hours, the 3 next passes ran for less than one hour each.
A few years back, I did something similar involving a lot more mailboxes: in such cases, having some frontal postfix, routing messages to either one of your former and newer backend depending on the mailbox you’re reaching could be a big help in progressively migrating users from one to the other.


Now let’s dive into BlueMind configuration. We won’t cover the setup tasks as you’ll find these in BlueMind documentation.

Assuming you managed to install BlueMind, and that your users base is stored in some LDAP, make sure to install BlueMind LDAP import plugin:

apt-get install bm-plugin-admin-console-ldap-import bm-plugin-core-ldap-import

Note that if you were used to previous BlueMind releases, you will now need to grant each user with their accesses to your BlueMind services, including the webmail. By default, a newly created user account may only access its settings.
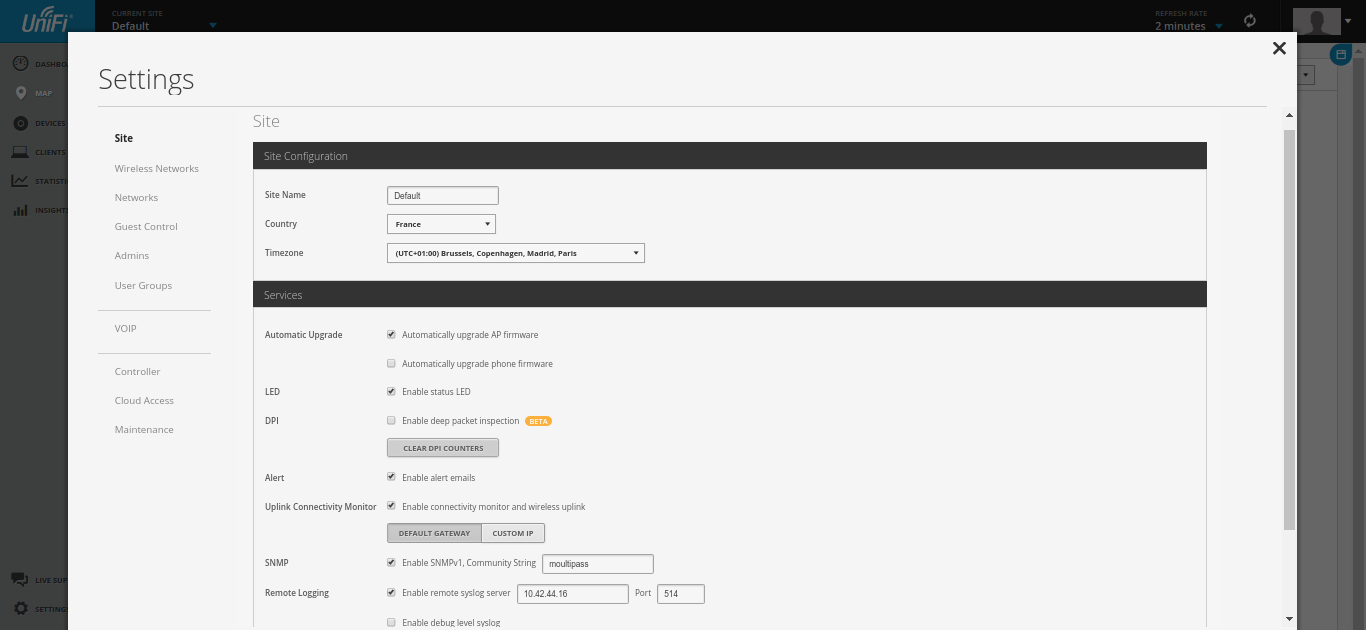
The management console would allow you to grant such permissions, there’s a lot of new stuff in this new release: multiple calendars per user, external calendars support, large files handling detached from webmail, …


The first thing we will configure is some firewall.
Note that Blue-Mind recommend to setup their service behind some kind of router, avoid exposing your instance directly to the Internet. Which is a good practice hosting pretty much everything anyway. Even though, you may want to setup some firewall.
Note that having your firewall up and running may lead to BlueMind installation script failing to complete: make sure to keep it down until you’re done with BlueMind installer.

On Debian, you may find the Firehol package to provide with an easy-to-configure firewall.
The service you would need to open for public access being smtp (TCP:25), http (TCP:80), imap (TCP:143), https (TCP:443), smtps (TCP:465), submission (TCP:587) and imaps (TCP:993).
Assuming firehol, your configuration would look like this:

mgt_ips=”1.2.3.4/32 2.3.4.5/32″
interface eth0 WAN
    protection strong
    server smtp accept
    server http accept
    server imap accept
    server https accept
    server smtps accept
    server submission accept
    server imaps accept
    server custom openssh “tcp/1234” default accept src “$mgt_ips”
    server custom munin “tcp/4949” default accept src “$mgt_ips”
    server custom nrpe “tcp/5666” default accept src “$mgt_ips”
    client all accept

You may then restart your firewall. To be safe, you could restart BlueMind as well.

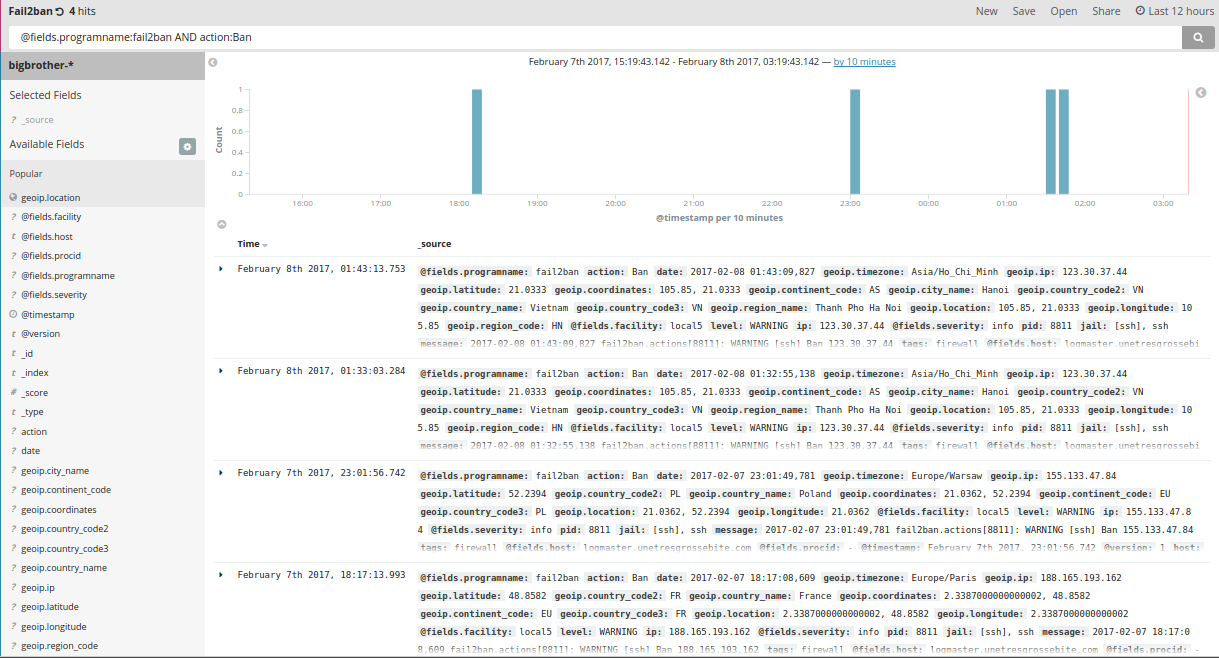
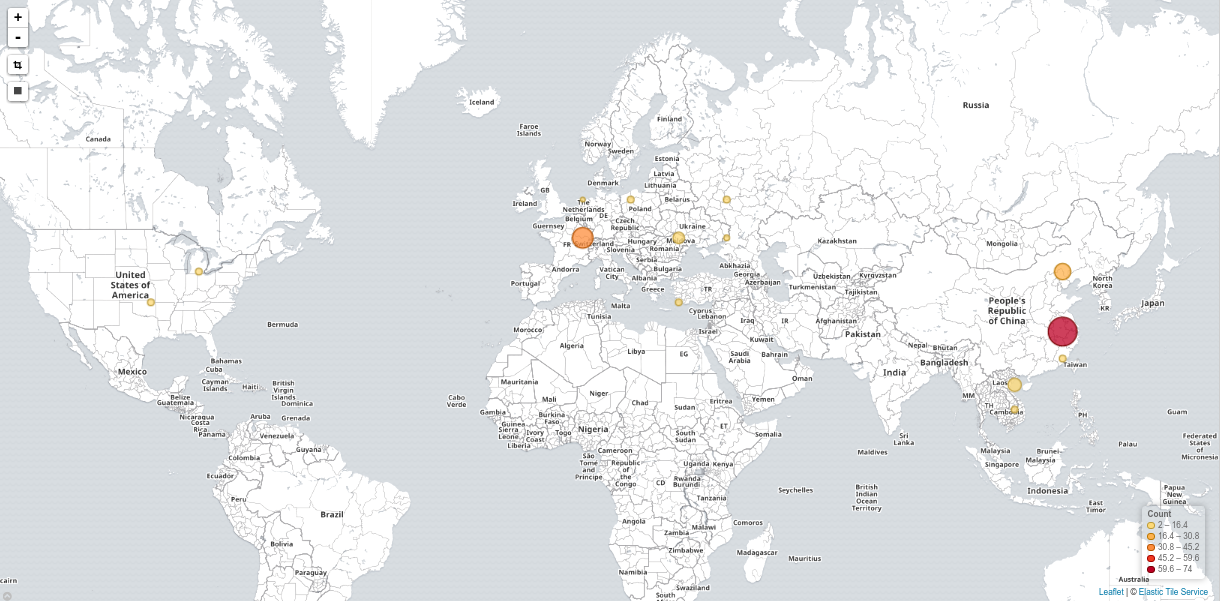
Optionally, you may want to use something like Fail2ban, also available on Debian. You may not be able to track all abusive accesses, although you could lock out SMTP authentication brute-forces at the very least, which is still relevant.

Note that BlueMind also provides with a plugin you could install from the packages cache extracted during BlueMind installation:

apt-get install bm-plugin-core-password-bruteforce


The second thing we would do is to install some valid certificate.  These days, services like LetsEncrypt would issue free x509 certificates.
Still assuming Debian, a LetsEncrypt client is available in jessie-backports: certbot. This client would either need access to some directory served by your webserver, or would need to bind on your TCP port 443, so that LetsEncrypt may validate the common name you are requesting actually routes back to the server issuing this request. In the later case, we would do something like this:

# certbot certonly –standalone –text –email me@example.com –agree-tos –domain mail.example.com –renew-by-default

Having figured out how you’ll generate your certificate, we will now want to configure BlueMind services loading it in place of the self-signed one generated during installation:

# cp -p /etc/ssl/certs/bm_cert.pem /root/bm_cert.pem.orig
# cat /etc/letsencrypt/live/$CN/privkey.pem /etc/letsencrypt/live/$CN/fullchain.pem >/etc/ssl/certs/bm_cert.pem

Additionally, you will want to edit postfix configuration using LetsEncrypt certificate chain. In /etc/postfix/main.cf, look for smtpd_tls_CAfile and set it to /etc/letsencrypt/live/$CN/chain.pem.

You may now reload or restart postfix (smtps) and bm-nginx (both https & imaps).

Note that LetsEncrypt certificates are valid for 3 months. You’ll probably want to install some cron job renewing your certificate, updating /etc/ssl/certs/bm_cert.pem then reloading postfix and bm-nginx.


The next thing we would configure is OpenDKIM signing our outbound messages and validating signatures of inbound messages.
Debian has some opendkim package embedding everything you’ll need on a mail relay. Generating keys, you will also need to install opendkim-tools.

Create some directory layout and your keys:

# cd /etc
# mkdir dkim.d
# cd dkim.d
# mkdir keys keys/example1.com keys/example2.com keys/exampleN.com
# for d in example1 example2 exampleN; do \
    ( cd keys/$d.com; opendkim-genkey -r -d $d.com ); done
# chmod 0640 */default.private
# chown root:opendkim */default.private

In each of /etc/dkim.d/keys subdir, you will find a default.txt file that contains the DNS record you should add to the corresponding zone. Its content would look like the following:

default._domainkey IN TXT “v=DKIM1; k=rsa; p=PUBLICKEYDATA”

You should have these DNS records ready prior to having configured Postfix signing your messages.
Having generated our keys, we still need to configure OpenDKIM signing messages. On Debian, the main configuration is /etc/opendkim.conf, and should contain something like this:

Syslog yes
UMask 002
OversignHeaders From
KeyTable /etc/dkim.d/KeyTable
SigningTable /etc/dkim.d/SigningTable
ExternalIgnoreList /etc/dkim.d/TrustedHosts
InternalHosts /etc/dkim.d/TrustedHosts

You would need to create the 3 files we’re referring to in there, the first one being /etc/dkim.d/KeyTable:

default._domainkey.example1.com example1.com:default:/etc/dkim.d/keys/example1.com/default.private
default._domainkey.example2.com example2.com:default:/etc/dkim.d/keys/example2.com/default.private
default._domainkey.exampleN.com exampleN.com:default:/etc/dkim.d/keys/exampleN.com/default.private

The second one is /etc/dkim.d/SigningTable and would contain something like this:

example1.com default._domainkey.example1.com
example2.com default._domainkey.example2.com
exampleN.com default._domainkey.exampleN.com

And the last one, /etc/dkim.d/TrustedHosts would contain a list of the subnets we should sign messages for, such as

1.2.3.4/32
2.3.4.5/32
127.0.0.1
localhost

Now, let’s ensure OpenDKIM would start on boot, editing /etc/default/opendkim with following:

DAEMON_OPTS=
SOCKET=”inet:12345@localhost”

Having started OpenDKIM and made sure the service is properly listening on TCP:12345, you may now configure Postfix relaying its messages to OpenDKIM. Edit your /etc/postfix/main.cf adding the following:

milter_default_action = accept
smtpd_milters = inet:localhost:12345
non_smtpd_milters = inet:localhost:12345

Restart Postfix, make sure mail delivery works. Assuming you can already send outbound messages, make sure your DKIM signature appears to be valid for other mail providers (an obvious one being gmail).


Next, we’ll configure SPF validation of inbound messages.
On Debian, you would need to install postfix-policyd-spf-perl.

Let’s edit /etc/postfix/master.cf, adding a service validating inbound messages matches sender’s domain SPF policy:

spfcheck unix – n n – 0 spawn
    user=policyd-spf argv=/usr/sbin/postfix-policyd-spf-perl

Next, edit /etc/postfix/main.cf, look for smtpd_recipient_restrictions. The last directive should be a reject_unauth_destination, and should precede the policy check we want to add:

smtpd_recipient_restrictions=permit_sasl_authenticated,
    permit_mynetworks,reject_unauth_destination,
    check_policy_service unix:private/policyd-spf

Restart Postfix, make sure you can still properly receive messages. Checked messages should now include some Received-SPF header.


Finally, we’ll configure SPAM checks and Spamassassin database training.
On Debian, you’ll need to install spamassassin.

Let’s edit /etc/spamassassin/local.cf defining a couple trusted IPs, and configuring Spamassassin to rewrite the subject for messages detected as SPAM:

rewrite_header Subject [ SPAM _SCORE_ ]
trusted_networks 1.2.3.4/32 2.3.4.5/32
score ALL_TRUSTED -5
required_score 2.0
use_bayes 1
bayes_auto_learn 1
bayes_path /root/.spamassassin/bayes
bayes_ignore_header X-Spam-Status
bayes_ignore_header X-Spam-Flag
ifplugin Mail::SpamAssassin::Plugin::Shortcircuit
shortcircuit ALL_TRUSTED on
shortcircuit BAYES_99 spam
shortcircuit BAYES_00 ham
endif

Configure Spamassassin service defaults in /etc/default/spamassassin:

CRON=1
ENABLED=1
NICE=”–nicelevel 15″
OPTIONS=”–create-prefs –max-children 5 -H /var/log/spamassassin -s /var/log/spamassassin/spamd.log”
PIDFILE=/var/run/spamd.pid

Make sure /root/.spamassassin and /var/log/spamassassin both exist.

Now let’s configure Spamassassin to lear from BlueMind SPAM folders content, create or edit /etc/spamassassin/sa-learn-cyrus.conf with the following content:

[global]
tmp_dir = /tmp
lock_file = /var/lock/sa-learn-cyrus.lock
verbose = 1
simulate = no
log_with_tag = yes

[mailbox]
include_list = ”
include_regexp = ‘.*’
exclude_list = ”
exclude_regexp = ”
spam_folder = ‘Junk’
ham_folder = ‘Inbox’
remove_spam = yes
remove_ham = no

[sa]
debug = no
site_config_path = /etc/spamassassin
learn_cmd = /usr/bin/sa-learn
bayes_storage = berkely
prefs_file = /etc/spamassassin/local.cf
fix_db_permissions = yes
user = mail
group = mail
sync_once = yes
virtual_config_dir = ”

[imap]
base_dir = /var/spool/cyrus/example_com/domain/e/example.com/
initial_letter = yes
domains = ”
unixhierarchysep = no
purge_cmd = /usr/lib/cyrus/bin/ipurge
user = cyrus

Look out for sa-learn-cyrus script. Note that Debian provides with a package with that name, that would pull cyrus as a dependency – which is definitely something you want on a BlueMind server.
Run this script to train Spamassassin from the messages in your Inboxes and Junk folders. Eventually, you could want to install some cron job.

Start or restart Spamassassin service. Now, let’s configure Postfix piping its messages to Spamassassin. Edit /etc/postfix/master.cf, add the following service:

spamassassin unix – n n – – pipe
    user=debian-spamd argv=/usr/bin/spamc -f -e
    /usr/sbin/sendmail -oi -f ${sender} ${recipient}

Still in /etc/postfix/master.cf, locate the smtp service, and add a content_filter option pointing to our spamassassin service:

smtp      inet  n       –       n       –       –       smtpd
    -o content_filter=spamassassin

Restart Postfix. Sending or receiving messages, you should read about spamd in /var/log/mail.log. Moreover, a X-Spam-Checker-Version header should show in your messages.


Prior to migrating your messages, make sure to mount /var/spool/cyrus on a separate device, and /var/backups/bluemind on some NFS share, LUN device, sshfs, …. something remote, ideally.
Your /tmp may be mounted from tmpfs, and could use the nosuid and nodev options – although you can not set noexec.

Assuming you have some monitoring system running: make sure to keep an eye on mail queues, smtp service availability or disk space among others, …


Being done migrating your setup, the last touch would be to set proper SPF, ADSP and DMARC policies (DNS records).

Your SPF record defines which IPs may issue mail on behalf of your domain. Usually, you just want to allow your MXs (mx). Maybe you’ll want to trust some additional record, … And deny everyone else (-all). Final record could look like this:

@ IN TXT “v=spf1 mx a:non-mx-sender.example.com -all”

Having defined your SPF policy, and assuming you properly configured DKIM signing, while corresponding public key is published in your DNS, then you may consider defining some DMARC policy as well.

@ IN TXT v=DMARC1; p=quarantine; pct=100; rua=mailto:postmaster@example.com

And ADSP:

_adsp._domainkey IN TXT “dkim=all;”

… and that’s pretty much it. The rest’s up to you, and would probably be doable from BlueMind administration console.

UniFi

While upgrading my network, I stumbled upon some UniFi access point a friend left over, a few months ago. It’s been lying there long enough, today I’m powering it on.

UniFi are Ubiquiti devices. If you are not familiar with these, Ubiquiti aims to provide with network devices (switch, router, network cameras, access points) that are controlled by a centralized web service. Once a device is paired with your controller, the VLANs, SSIDs, … you’ve already defined would be automatically deployed. Although I’m not at all familiar with their routers, switches or network cameras, I already worked with their access points covering large offices with several devices, roaming, VLANs, freeradius, automated firmware upgrades, PoE, … These access points can do it all, have a pretty good range of action in comparison with the world-famous WRT54-G, and can serve 100s of users simultaneously.

site settings

site settings

Unifi is also the name of the controller you would install on some virtual machine, managing your devices. Having installed their package on your system, you should be able to connect on your instance’s port 8443 using https. Once you’ld have created your administrative user, then a default SSID: you would be able to discover devices in your network, and pair them to your controller.

The Unifi controller allows you to define a syslog host, SNMP community string, … And also shows a checkbox to “enable DPI”, which requires an USG (Unifi Security Gateway). Pretty much everything is configured from this panel.

map

Map

The Unifi controller would also allow you to import maps of the locations you’re covering. I could recommend Sweet Home 3D to quickly draw such map. On a small setup like mine, this is mostly bling-bling, still it’s pretty nice to have.

events

events

The controller provides with a centralized log, archiving events such as firmware updates, clients connections, when a user experienced with some interference, … Pretty exhaustive.

client

client

The controller also offers with detailed statistics per SSID, access point, client device, … allow tagging or blocking hardware addresses.

stats

stats

Unifi intends to provide with enterprise-grade devices, and yet their cheapest access points prices are comparable to the kind of SoHo solutions we all have running our home network.

Even though you would never use most of the features of their controller, and even if you do not need to deploy several access points covering your area, UniFi access points can still be relevant for their ease of use, features set and shiny manager. And especially if your setup involves several devices with similar configurations: you’ll definitely want to give UniFi a shot.